Existing and custom created workspaces can be personalized to fit the project's needs. In this instruction, learn how to add a tile to a workspace to allow a quick view of and navigation to a filtered log.
1.11 Personalize a Workspace Tile
Menu1.11.1 Background Information
1.11.2 Work Instructions
1.11.2.1 Create a Tile
Create additional information or count tiles in any workspace if the information you would like to see is not available by default. Remember, personalizations are only visible to you. Clicking on an information tile navigates you to the source log the tile was based on.
This example is in the Submittal log, but you can create workspace tiles for any log that your security profile has access to.
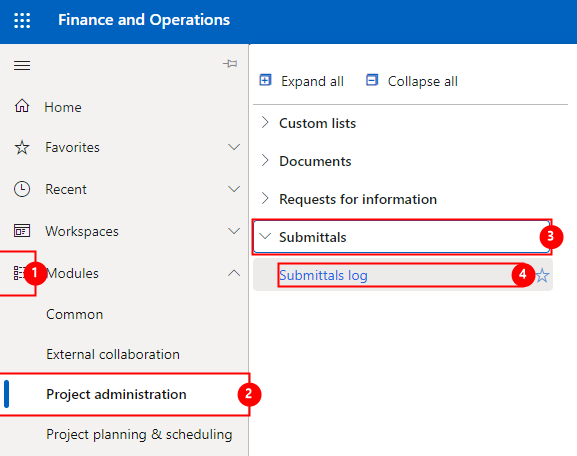
- Click the Modules icon.
- Click the Project administration module.
- Click the Submittals menu section.
- Click the Submittals log menu item.
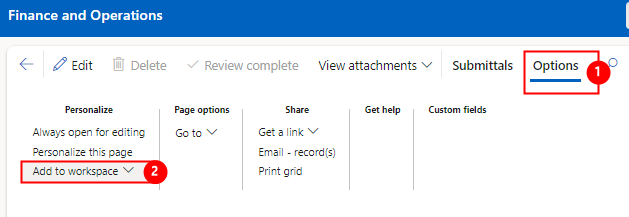
- When the log is filtered to the desired view, and the view is saved, click the Options tab from the action pane.
- Under the 'Personalize' group, click the Add to workspace button.
Ensure you have created and saved the view for which you want to create a tile. You can filter and re-arrange the logs the way you want them to be displayed each time you click the tile in the workspace. For more information, view the 'Create a Custom View' work instruction.
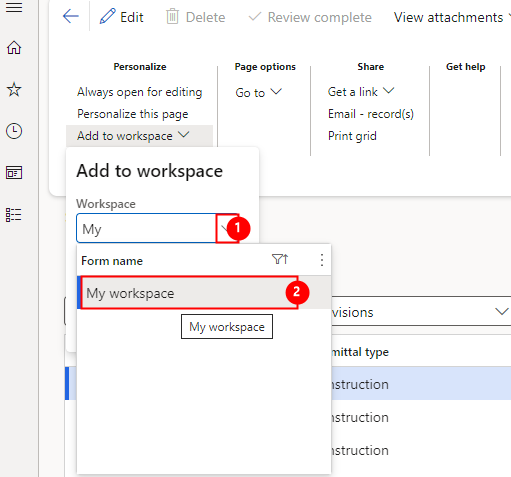
- Click the Workspace dropdown and enter the name of the workspace you want to add the tile to. This could be a default workspace or a custom workspace you created.
- Select the desired Workspace the tile should appear in.
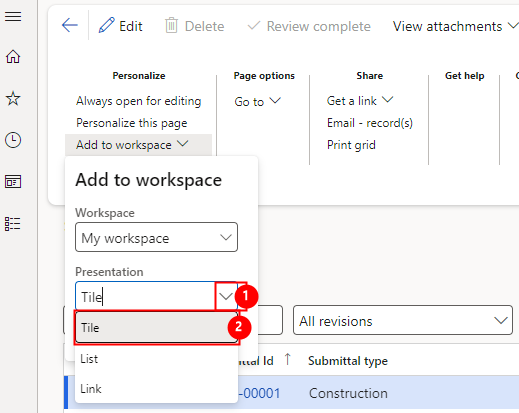
- Click the Presentation dropdown.
- Select a Presentation to choose how you would like to view the workspace. Here, we have selected Tile.
Click the Configure button.
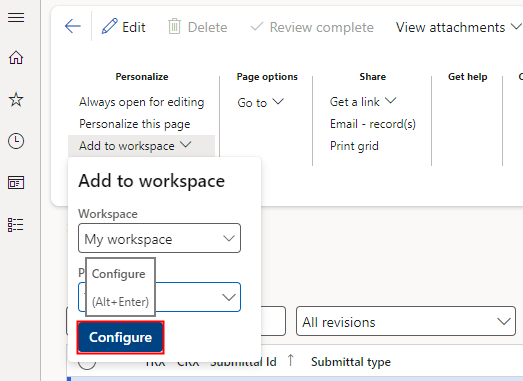
- The 'Configure tile' dialog opens.
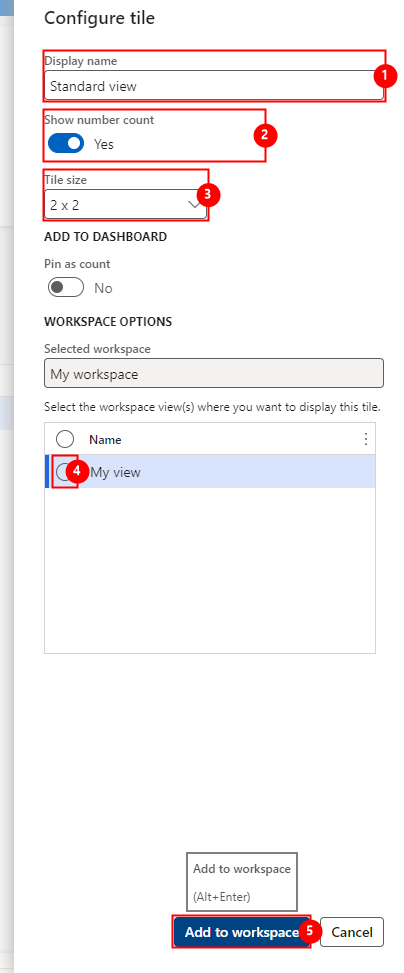
If desired, you can edit the Display name field with the text you want to appear as the tile label. - Set the Show number count toggle to 'Yes', to include a numeric count of records currently matching the filtered view.
- You can set the Tile size by selecting from the dropdown. This will determine how large or small your tile will display in your workspace. If you are creating multiple tiles for different filtered views, this may help identify ones of greater importance so they stand out from the other tiles.
- You can choose which workspace views you want the tile to display in. Click a View to apply the customization.
Note: Only 'Personal views' can be customized. For more information on how to create a personal view, refer to Create a Custom View work instruction. - Click the Add to workspace button.
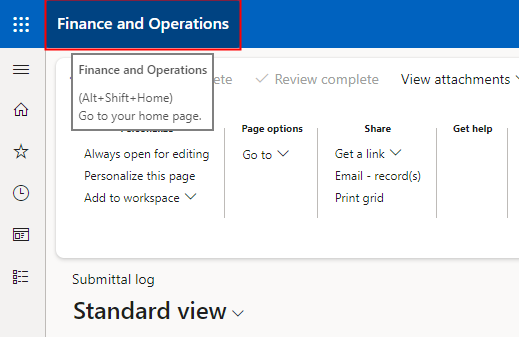
Click the Finance and Operations button to return back to the Dashboard.
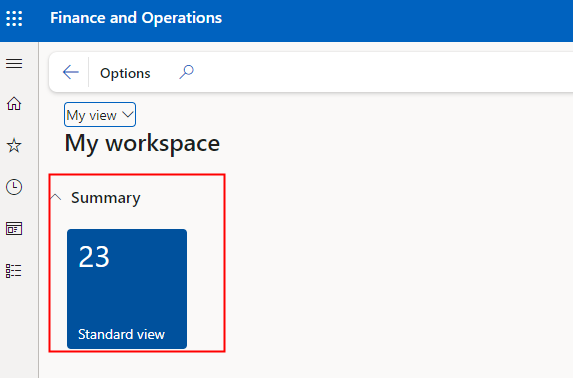
Click My Workspace to confirm that the new tile is visible.
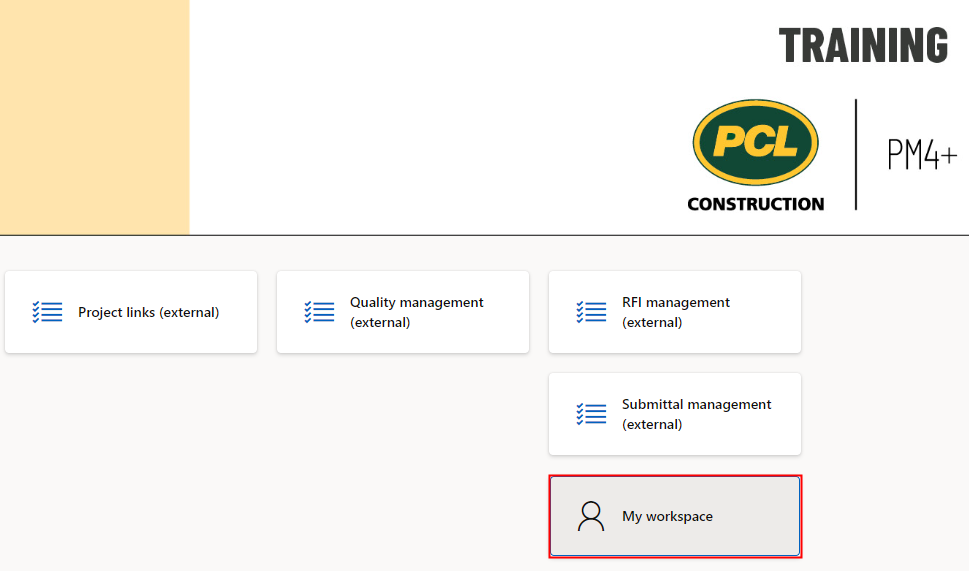
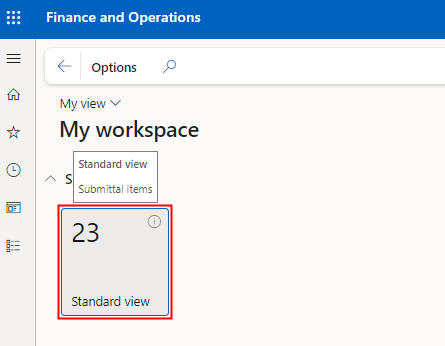
Select the Tile to test and confirm the record count. Use it to access your personalized view of a log.
1.11.2.2 Remove a Tile or Modify a Tile Name
You can change the label on any tile that you find in your workspace; however, you can only delete a tile you created.
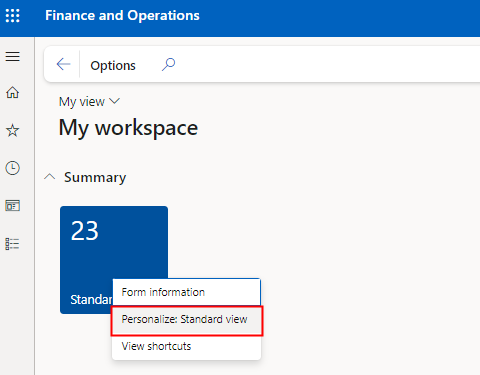
Right click the Tile to remove or modify.
From the list, click Personalize: [Name of Tile].
- To change the name of a tile, update the text in the Name field.
- To change the Tile size, select from one of the options listed.
- To remove the title, click the Remove link.
- Click outside the menu area to close the menu.

Your comment